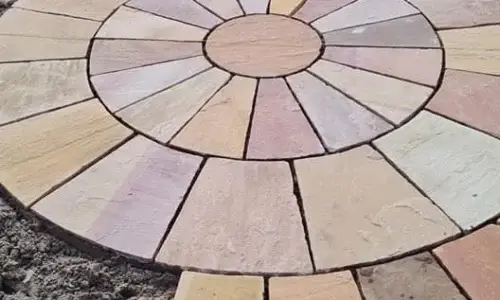
There’s something properly satisfying about a job like this. You start with a bare patch of ground and end up with something solid, tidy, and ready for summer evenings outside. Maybe you’re after a small patio for the barbecue, or a simple path so you’re not wading through mud every time it rains. Whatever the plan, learning how to lay paving slabs properly will save you money – and the sense of pride when it’s done is hard to beat.
Planning and Preparation
Before you lift a single slab, take a moment to think about what you want the finished space to look like. Is it somewhere for a table and chairs, or more of a walkway? Have a wander around the garden, tape measure in hand, and picture it in your head.
Once you’ve decided on size and shape, mark it out with string or spray paint so you can see the outline clearly. Add a gentle slope away from the house, about a centimetre for every metre, so rain drains naturally instead of pooling where you don’t want it.
It’s also worth choosing your slabs carefully. Cheaper concrete ones are fine for a quick fix, but if you want something that’ll last, look at sandstone or porcelain. They cost more upfront, but they’ll stay looking fresh for years.
Getting the Ground Ready
This is the bit that makes or breaks the job. A solid base keeps everything level for the long haul, so don’t rush it.
Start by digging down around six inches below your finished height. That gives you space for the hardcore and mortar bed. Fill the area with about four inches of hardcore or MOT Type 1 and compact it firmly. If you can borrow a compactor plate, it’ll make light work of it – stamping around in boots just doesn’t cut it.
Check the slope again before you move on. The ground should feel firm underfoot and drain away gently. Once it’s level and compact, you’re ready to mix the mortar.
Mixing and Laying the Mortar
Mix four parts sharp sand to one part cement, adding water a little at a time. You want a thick, workable consistency – think peanut butter, not soup. Spread a layer roughly two fingers deep across a small section of your base.
Work in smaller patches rather than the whole area at once; mortar can dry faster than you expect, especially on a warm day.
Laying the Slabs
Now the satisfying part starts – actually laying the slabs. Begin at a straight edge, usually nearest the house, and work your way out.
Lay each slab gently onto the mortar, then tap it down with a rubber mallet until it sits firm and level. Keep checking with a spirit level to make sure it’s flat and following that slight slope. If one slab sits high, lift it and scrape away a little mortar. If it’s low, add some more underneath.
Leave a consistent gap between each slab, about the width of a finger is enough, so you’ve got space to fill later. Once everything’s down, walk away for a couple of days and let it set properly before you start walking on it.
Finishing and Pointing
Once the slabs are set, it’s time to fill those gaps and give everything a clean finish. Mix up three parts building sand to one part cement (dry) and brush it into the joints with a soft broom. When everything’s filled, give it a light misting with water to help it set – not a soaking, just enough to settle the mix.
If you’d rather skip the mess, ready-mixed jointing compounds are easier and just as effective. Whichever you use, this part really makes it look complete.
Keeping It Looking Good
A good patio doesn’t need loads of attention, just a bit of care every now and then. Give it a regular sweep to keep moss and leaves from settling. A bucket of warm, soapy water works perfectly for cleaning – no need for harsh chemicals.
If a joint cracks or weeds start poking through, fix it early before it spreads. And when winter rolls around, avoid using salt to melt ice – it can mark and weaken some types of stone.
Wrapping Up
Laying paving slabs isn’t complicated – it’s just about doing the basics well. Get the base right, take your time with the levels, and mix your mortar properly. Do that, and you’ll have a patio or path that not only looks smart but stays that way.
When it’s all finished and you’re sat out there with a drink in hand, feet up on the new slabs, you’ll know every hour of effort was worth it. And if you’d rather leave the heavy lifting to the pros, EQ Turf can help. From premium paving to expert installation, we’ll get your outdoor space looking its best – without you having to lift a spade. Give us a call on 0115 937 1737 or fill out our online contact form, and one of our team will be happy to help.
Posted in Latest News